Easy Woodworking
-
@mik I never did any veneer work (needed a good press). However, I did enjoy inlays.
-
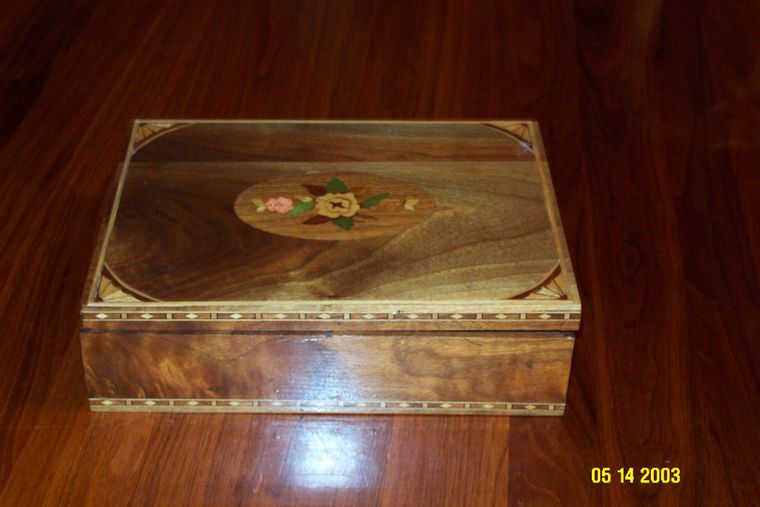
@mark Thanks @mark ! It was a fun little project. I did it in ¼" solid walnut for the carcass of the box. The top was edge-joined walnut. It's the only part I'm unhappy with. I should've done a better job matching the grain.
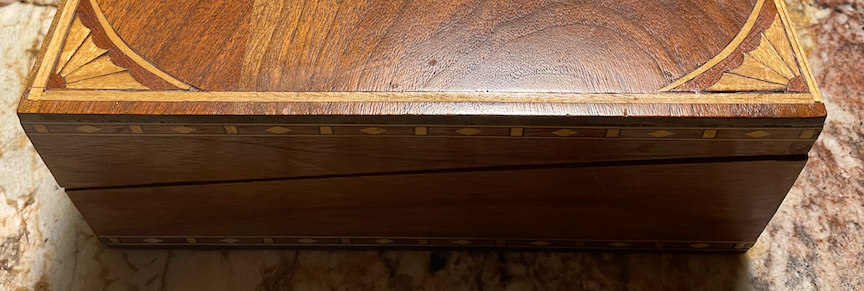
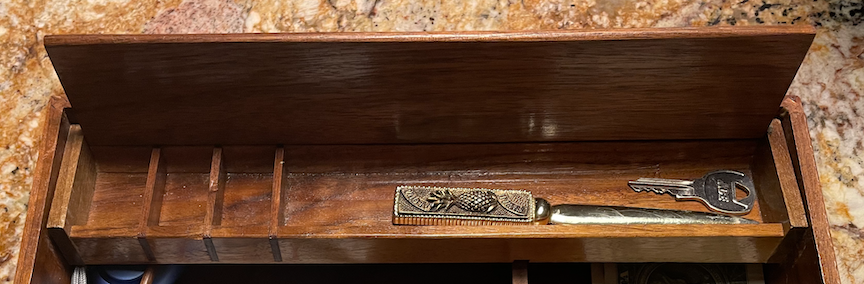
Once that was done, the box was cut on an angle to allow the hinged top to open at a suitable angle for the writing surface. Hinges were installed, and a small tray for pens and whatever was installed in the "non writing surface" of the box. Finally, inlays were added to the top, with added banding around the sides and inlays in the corners and center of the box.
These are pics I took tonight:
The box closed:

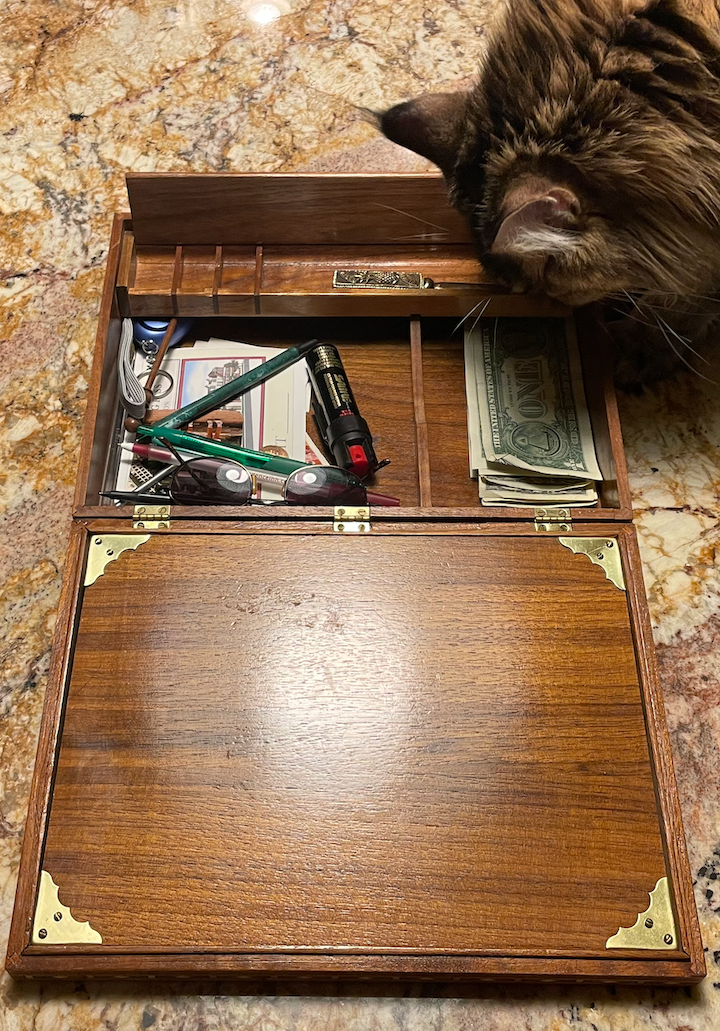
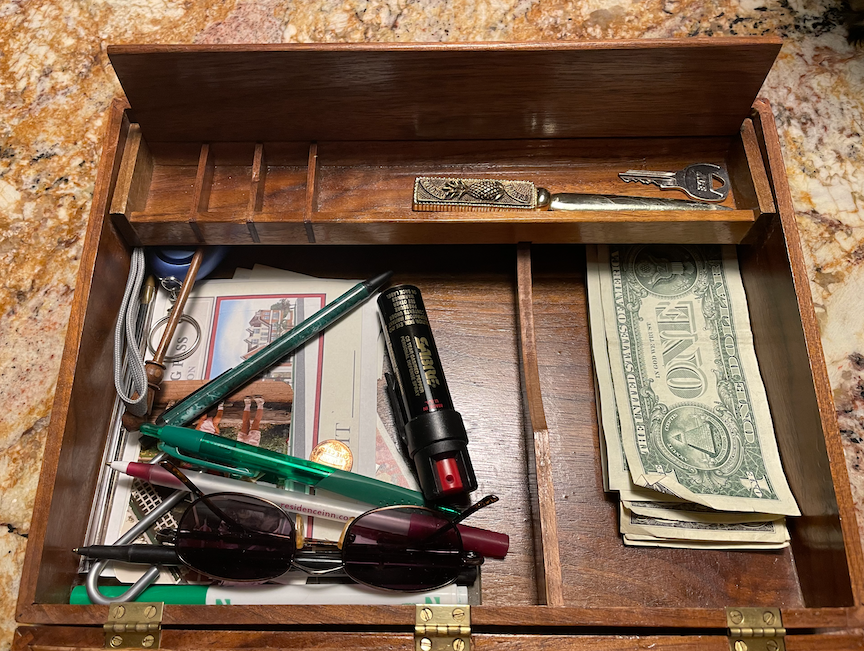
The box opened, showing the "writing" surface.

Some perspective on size. Note the hinges.
You can see the angled cut here:

-
@mik said in Easy Woodworking:
Still pretty advanced work.
The "writing surface" is walnut plywood. I should have used that for the exterior of the box. I'm also not all that happy with how the center inlay doesn't blend with the entire lid. Corners and strips are good, however.
But, this was a "throwaway" project - one to learn how to do inlays. It served its purpose.
"Now look here, you Baltic gas passer... " - Mik, 6/14/08
The saying, "Lite is just one damn thing after another," is a gross understatement. The damn things overlap.
-
@mik said in Easy Woodworking:
Still pretty advanced work.
The "writing surface" is walnut plywood. I should have used that for the exterior of the box. I'm also not all that happy with how the center inlay doesn't blend with the entire lid. Corners and strips are good, however.
But, this was a "throwaway" project - one to learn how to do inlays. It served its purpose.
@george-k said in Easy Woodworking:
@mik said in Easy Woodworking:
But, this was a "throwaway" project - one to learn how to do inlays. It served its purpose.
Throwaway my ass, that's an amazing project.
-
@George-K that is awesome work!!!!
-
The process, as far as I can remember, was pretty interesting.
First, you build a box - and the mitered corners are reinforced with a spline, giving good glue surface to keep the joint stable.
After assuring that it's really square (90 degrees at each corner), the top and bottom of the box are attached.
Then, with an attachment on the fence of the tablesaw, the box is cut into two pieces, at an angle.
Angled pieces are cut to insert into the top for support of the writing surface, and mortises are cut for hinges.
The areas for inlays are routed out, and they are glued in and sanded flush. Brass corners attached to the writing surface.
Finally the compartment for holding stamps, pens etc are made (pretty simple stuff, though the hinge was challenging for me).
-
Nice work, George! If the project is small enough, instead of a press, I iron on most veneer. (skim coat of glue to the surfaces, allow to flash off, then press down with a hot iron)
Quick, easy to control, and lasts..
Hello! It looks like you're interested in this conversation, but you don't have an account yet.
Getting fed up of having to scroll through the same posts each visit? When you register for an account, you'll always come back to exactly where you were before, and choose to be notified of new replies (either via email, or push notification). You'll also be able to save bookmarks and upvote posts to show your appreciation to other community members.
With your input, this post could be even better 💗
Register Login